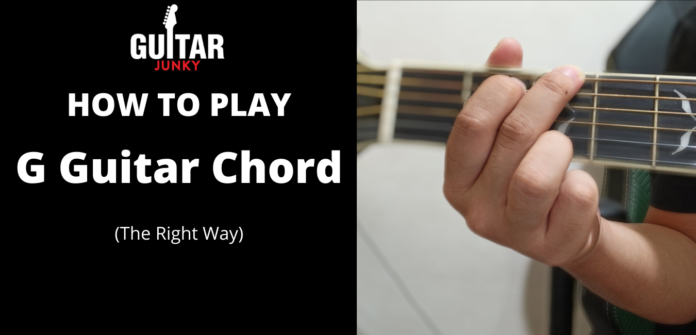
Playing the G guitar chord the right way is a crucial skill that all beginner guitarists need to master. The G chord is one of five basic guitar chord shapes that can make a fantastic tune.
Playing Johnny Cash’s Ring of Fire or Green Day’s Good Riddance should be a cinch once you master this foundational guitar chord.
The real question is how do you play the G major and what is the best way to play this chord?
Contents
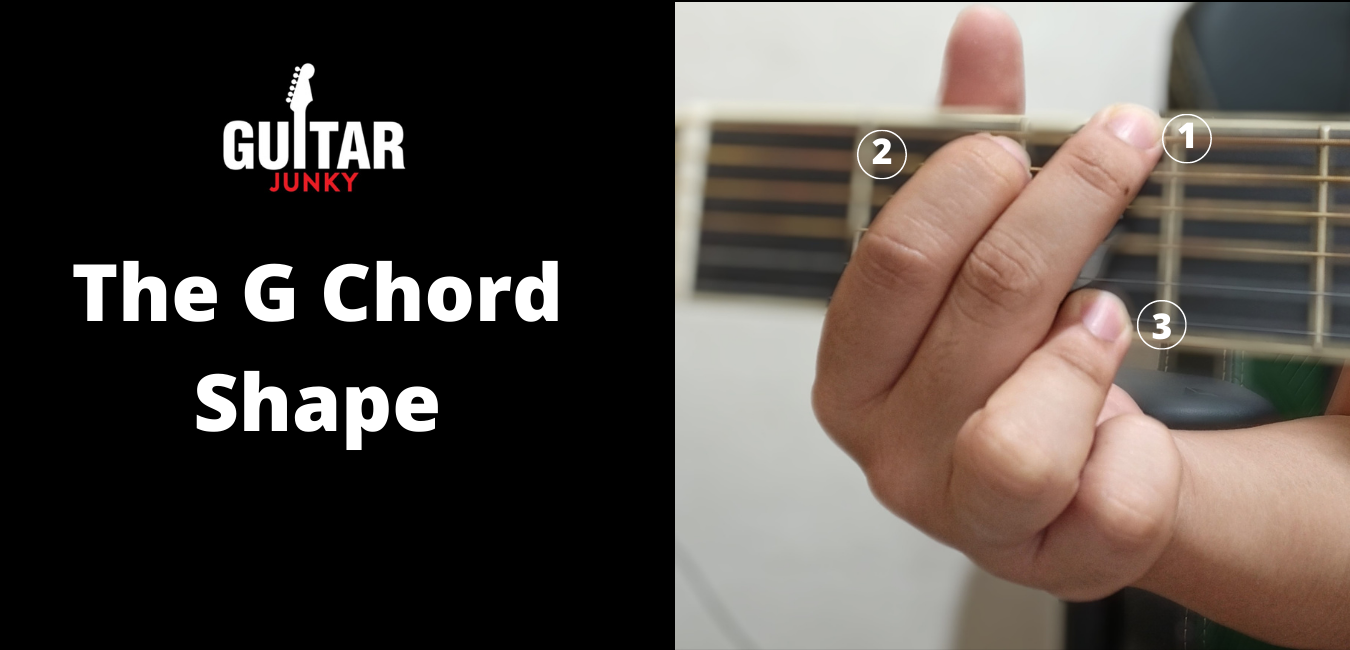
The G Chord Shape
The G chord in the guitar has almost the same shape as the C chord. You have three fingers pressing the strings on the 2nd and 3rd frets.
The C chord entails pressing the 2nd (B) string on the 1st fret, the 5th (A) string on the 2nd fret, and the 6th (low E) string on the 3rd fret.
The low E or the 6th string is the string high up on the fretboard.
The high E is the one at the bottom. The G chord shape requires you to retain the finger placement on the A (2nd fret) and low E (3rd fret) strings.
You can then move your finger from the B string on the 1st fret to the high E (first) string on the 3rd fret.
If you already know how to play the C chord, getting the G chord on guitar should be a walk in the park.
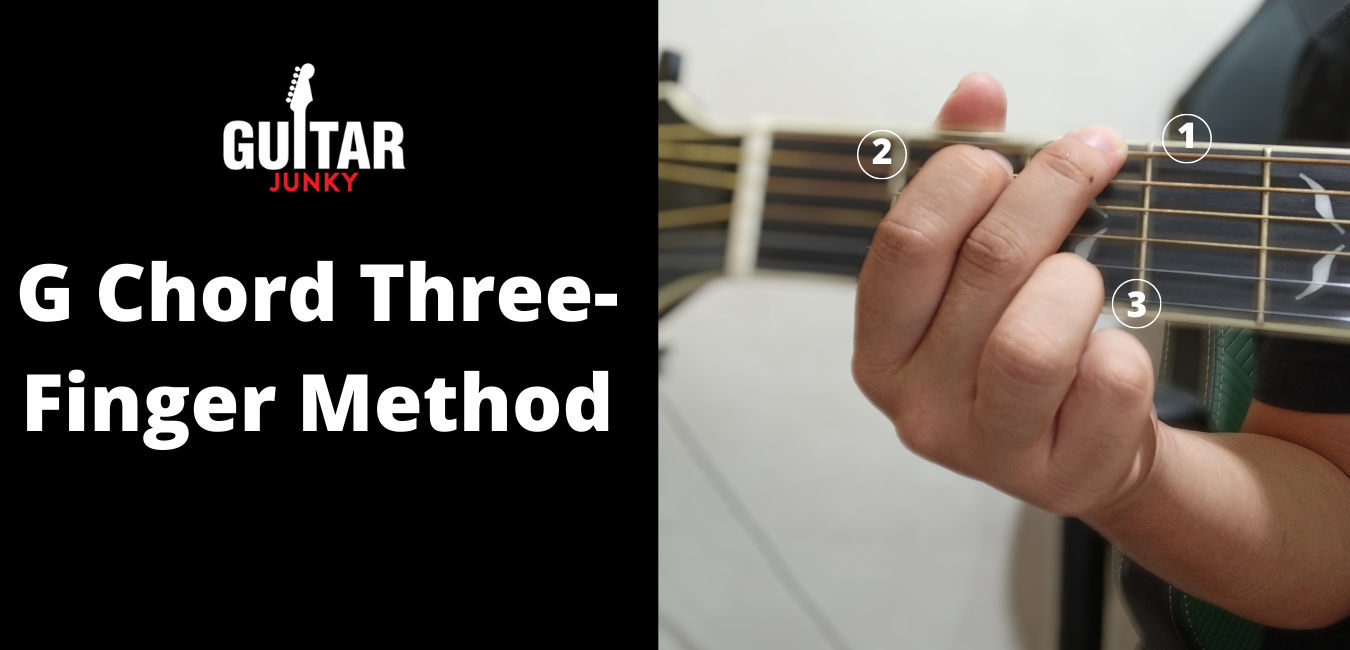
How Most Guitarists Play the G Chord – Three-Finger Method
The chord shape we described above is the most common shape guitarists play the G major chord. It is an easy method that produces a good G chord sound.
Here is how you execute the shape.
- Place your middle finger on the 6th (low E) string of the 3rd fret.
- Place your middle finger on the 5th (A) string of the 2rd fret.
- Position your ring finger on the 1st (high E) string of the 3rd fret.
Fender recommends strumming all six strings from the low E high up on the fretboard down to the high E at the lower edge of your guitar.
Easy, right?
Some guitar books may tell you to play the high E string with the pinky instead of your ring finger to get the desired G chord tune. You can do that, too.
However, it requires a little patience and a bit of exercise for your pinky. This finger’s strength is not as great as the other three guitar-playing fingers.
While the G chord pinky method does not produce a better sound, it does offer convenience when playing a basic chord progression.
It is most useful when the song involves a G-C or a G-D pattern.
It is more convenient and more comfortable to move to either C or D from G with the pinky method.
You can enjoy more fascinating songs with this technique.
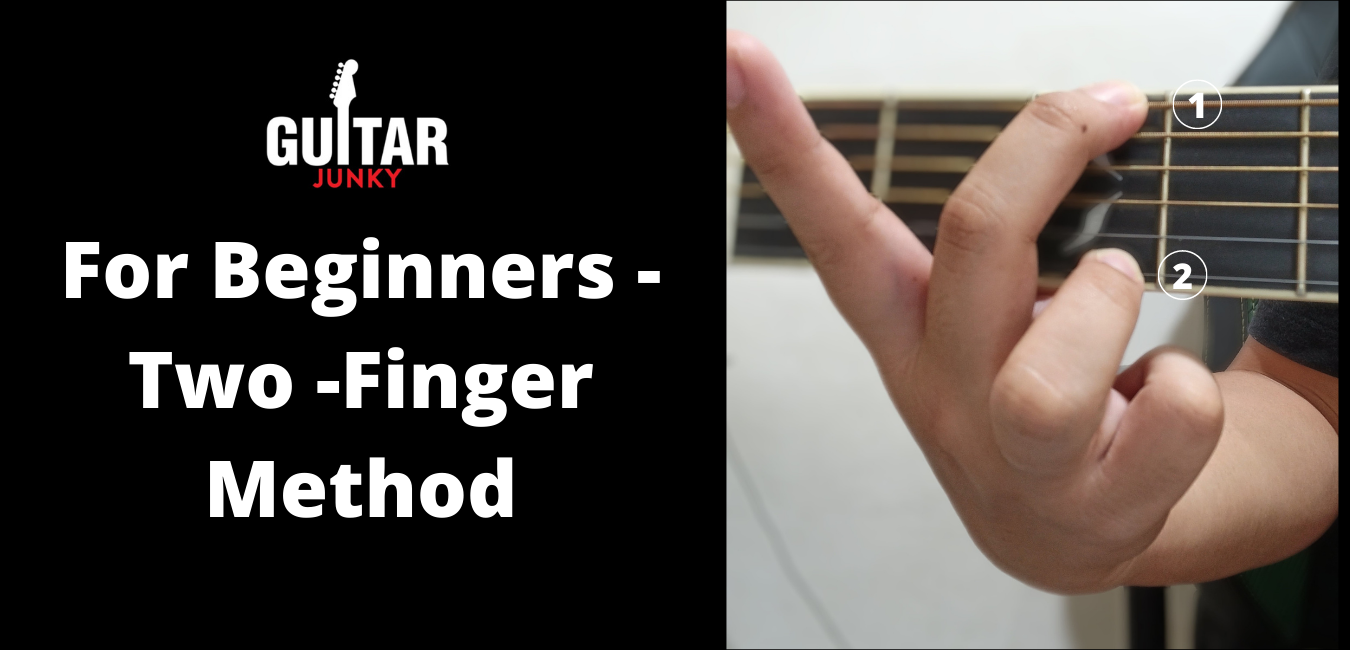
The G Chord for Beginners – Two-Finger Method
If you think the three-finger G major chord shape is easy, you can simplify it further. The two-finger method removes the B (fifth string) on the 2nd fret.
As such, you will only place your middle or index and ring or pinky on the 3rd fret, pressing the low E and the high E.
While it looks easy enough, there is one key thing you should observe when playing this method.
You should always mute the 5th (A) string and strum only the 6th and the rest of the strings.
Beginners might find it quite unusual not to hit the string below the 6th string.
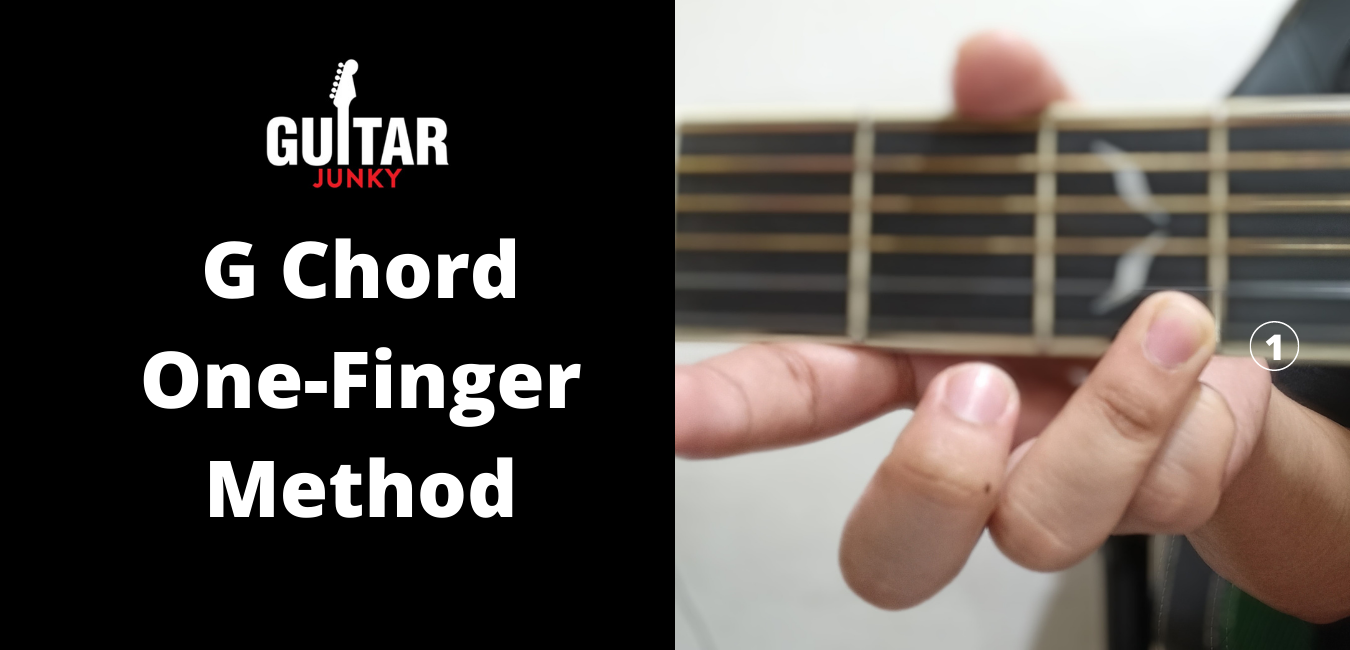
The Simplest Version of the G Chord – One-Finger Method
If you find it difficult to stretch your index or middle finger to reach the 6th or 5th strings, the one-finger method should be a great way to play the G chord on guitar.
This method only requires you to press the high E (1st) string on the 3rd fret of your guitar.
Most guitarists play it with their ring finger, although you can try with your pinky or whichever finger you are most comfortable with.
There is a catch, though. You can only strum the three lower strings of your guitar.
This G major chord is perfect for children and beginner guitarists who may find it difficult to stretch or coordinate their finger movements.
This method can be an excellent exercise for strengthening the fingers, making it a good foundation for other guitar chords.
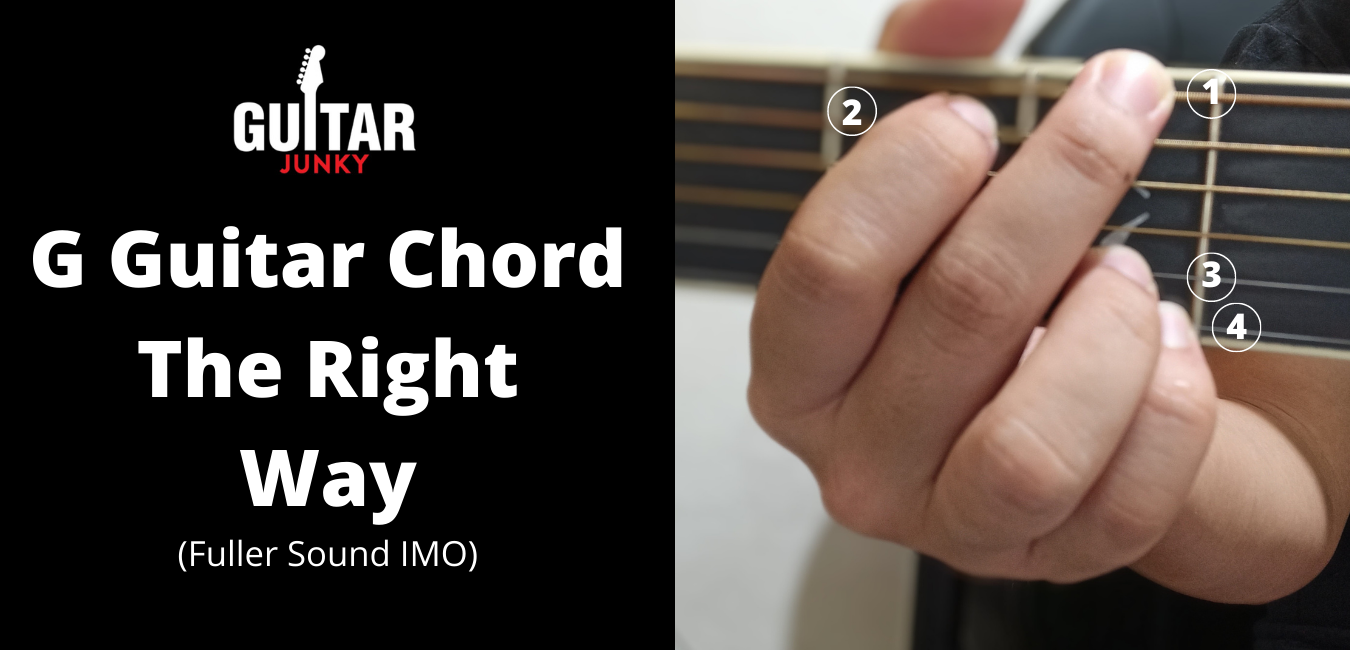
Playing G Chord the Right Way – Four-Finger Method (Fuller Sound)
Some guitarists find it more pleasing to play the G chord on guitar using four fingers because it creates a fuller G major note sound.
It is also an excellent method for songs that have a G-Dsus4 chord progression.
You can move your fingers into the Dsus4 chord almost instinctively. Strumming the four-finger G chord has the three-finger G chord shape as its base.
The difference here is that you will have to use your pinky to press the high E string on the 3rd fret.
Your ring finger should now press the string above the high E or the B (second) string.
You can then proceed to strum all six strings like the open G chord, three-finger method.
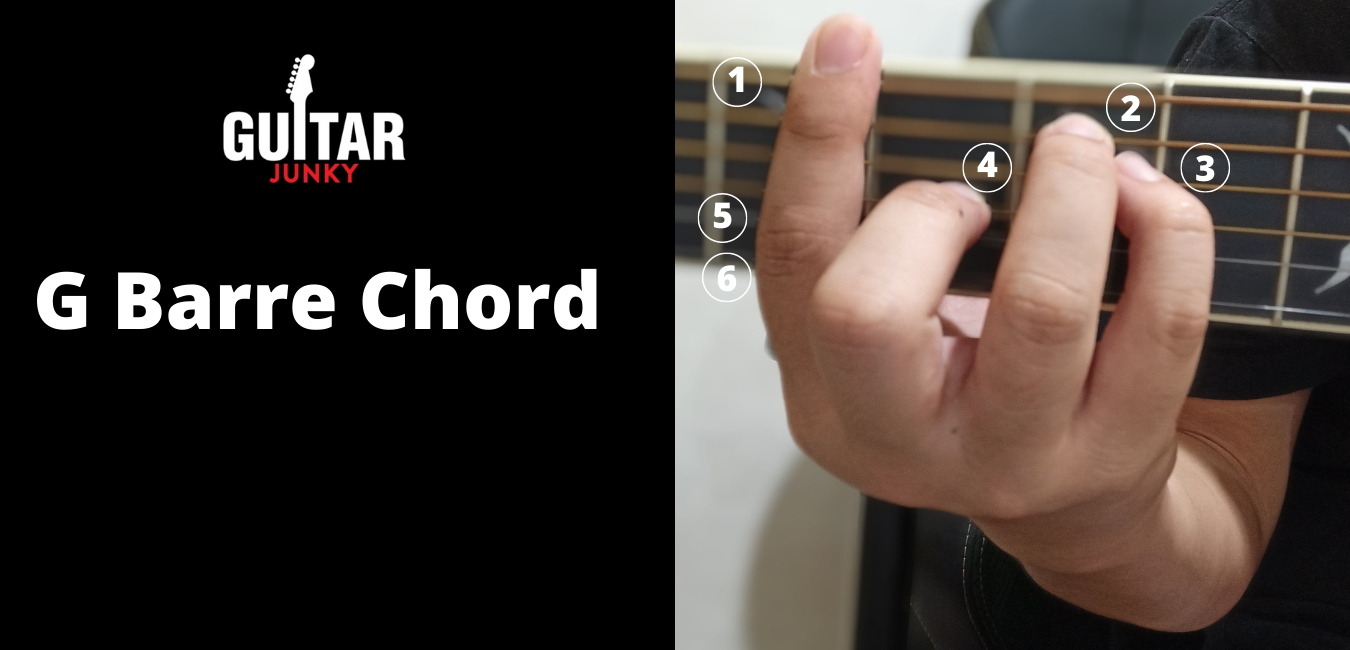
The G Barre Chord
This G chord is not as easy as the others we have already discussed.
However, if you want to be the rock star that you envision yourself to be, you have to learn this shape.
Place your index finger on the third fret to cover all six strings. Next, position your middle finger on the G string on the 4th fret.
Place your pinky on the D string on the 5th fret and your ring finger on the A string also on the same fret. This G chord is perfect for songs that have an F-G or G-F chord progression.
They have the same form, only different positions on the fretboard.
This method is perfect if you want to master the slide.
Suffice it to say, you may want to start with these shapes because they are the most common.
You can always learn other methods as you progress in your guitaring journey.
Here are the advanced ways you can play the G guitar chord:
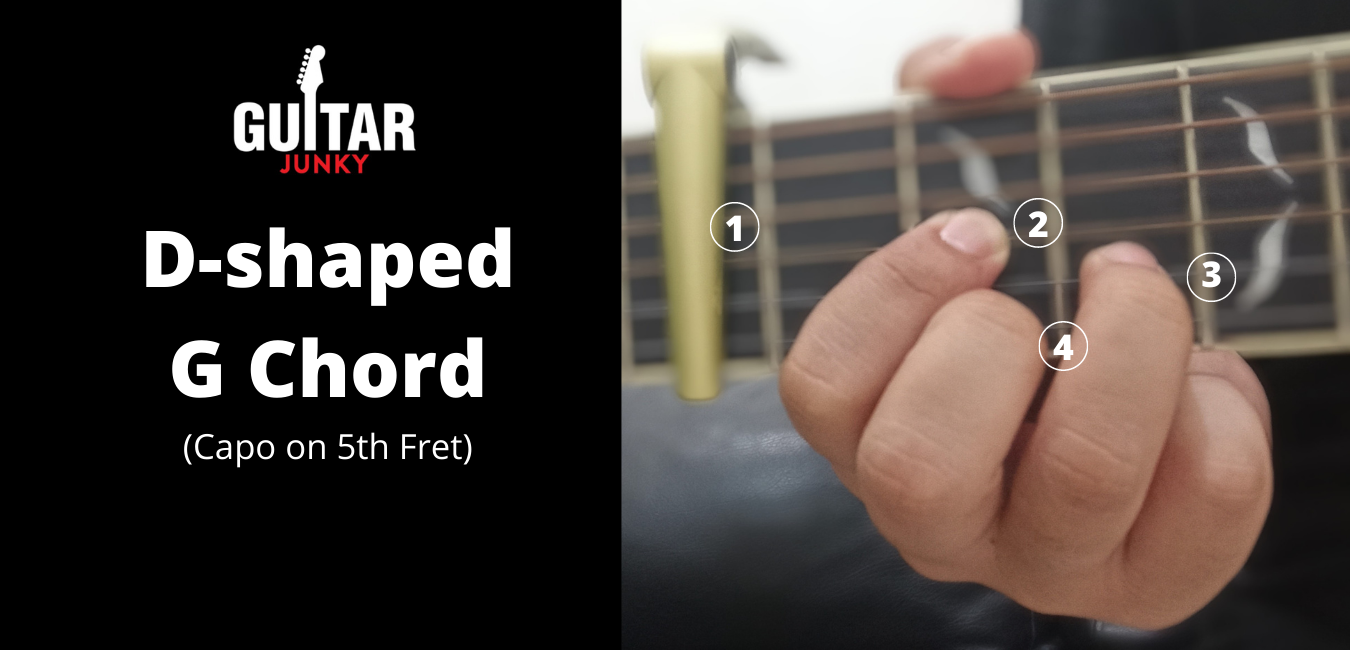
The D-Shaped G Chord
- Place your capo on the 5th fret (1).
- Place your index finger on the 2nd fret (2).
- Place your ring finger on the 3rd fret (3).
- Place your pinky finger on the 2nd fret (4).
- Strum from the (1) string (G note), all the way down.
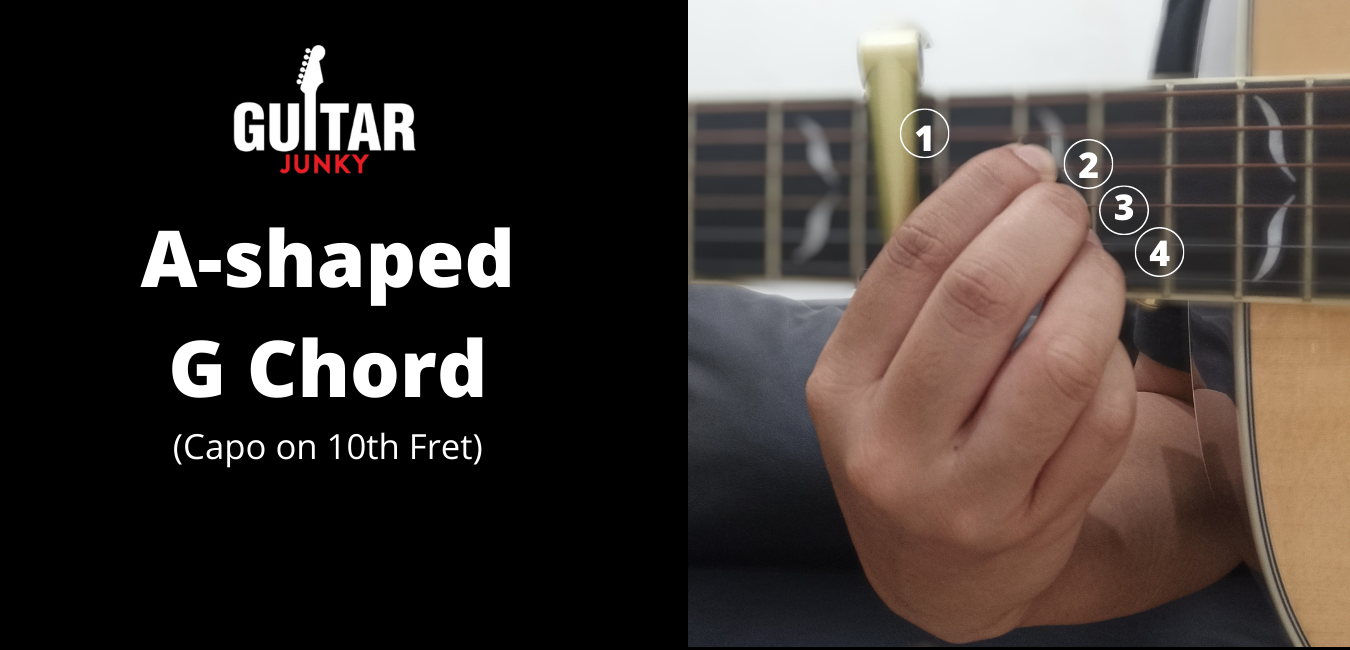
The A-Shaped G Chord
- Place your capo on the 10th fret (1).
- Place your index finger on the 2nd fret (2).
- Place your ring finger on the 2nd fret (3).
- Place your pinky finger on the 2nd fret (4).
- Strum from the (1) string (G note), all the way down.
