Recording studios don’t quickly have all the professional and advanced tools and equipment in just a week or two. They have to go through stages, so you can properly organize your work and it also has to go with your workload.
Plus, having the advanced equipment all in one go would really exhaust your finances. But before we start, you need to know this first.
Contents
4 Stages of a Studio Recording Setup
Bedroom Studio
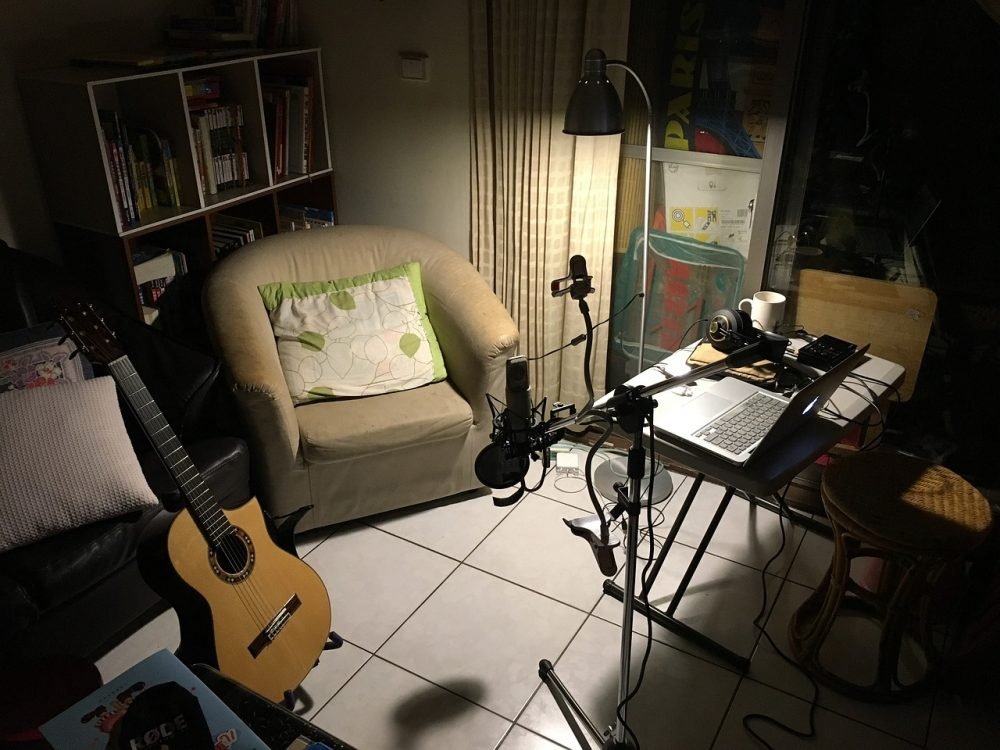
This is where all your dreams come to life, it’s where it all begins. The stepping stone of your music production career starts with the Bedroom Studio.
It’s a small and simple (normally a beginner’s) setup that would take place in your bedroom. You’ll only need the basic studio equipment on a bedroom studio.
Dedicated Home Studio
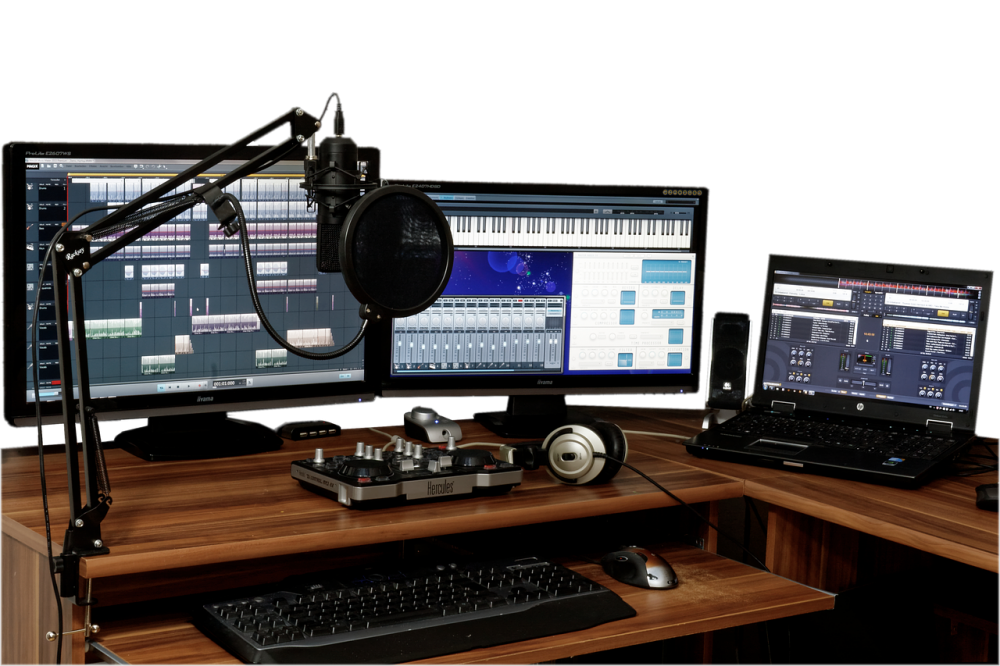
A slight upgrade from a Bedroom Studio, is the Dedicated Home Studio. This is where you purposely have a home recording studio kit for making your music.
Also Read: Common Mistakes To Avoid When Recording In Your Home Studio
With this upgrade, comes an addition of recording equipment, too. Tools and equipment that may not be typically seen in a Bedroom Studio.
Semi-Pro Studio
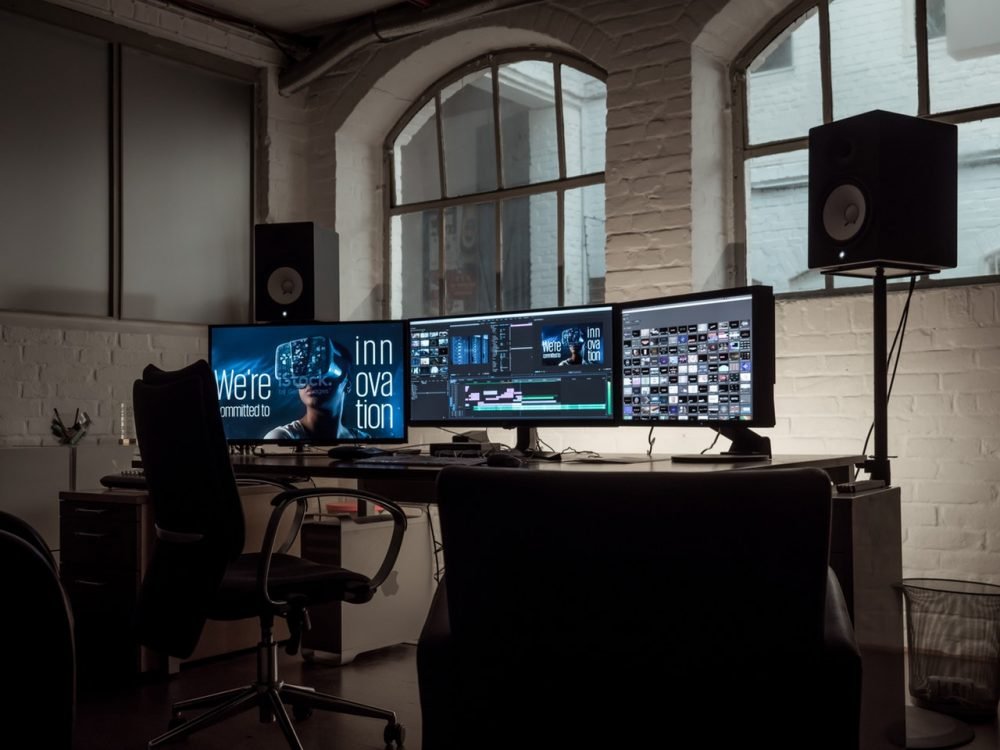
This studio can be located inside the comforts of your own home or at a different location. Semi-pro Studios are often used to record multiple vocals or instruments simultaneously.
Normally, this type of studio is for creating tracks and mixes for commercial use, so, you’ll need additional equipment for this purpose.
Pro Studio
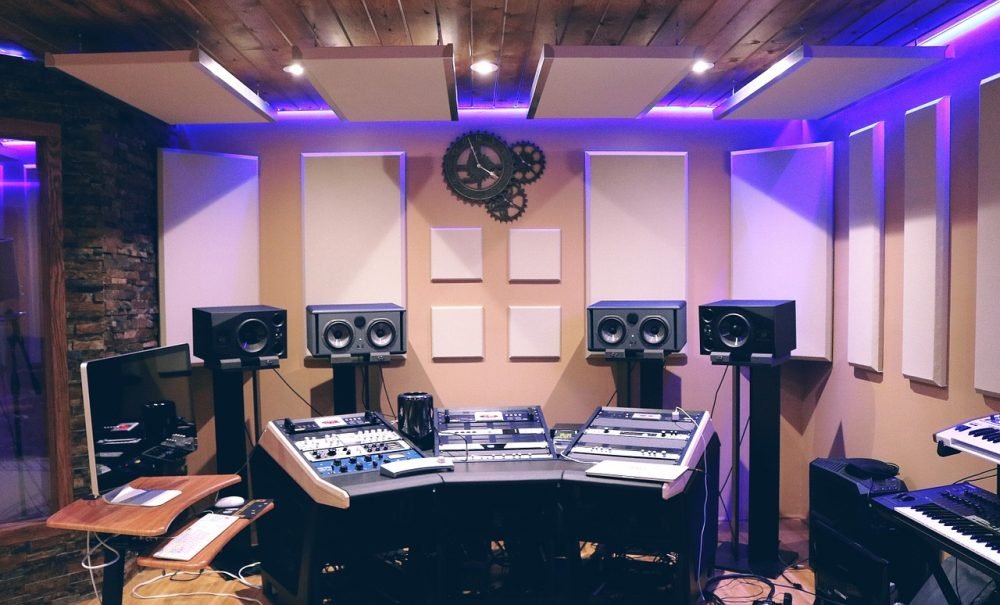
The last stage a recording studio goes through is the Pro Studio. Usually located at a commercial facility, Pro Studios should have all the necessities to produce the best sound and outcomes.
Now, without further ado, let’s go through the list.
FOR BEDROOM STUDIO

Computer / Laptop
Computers are the most important and basic equipment you’ll ever need. I don’t think I should elaborate why.
For a bedroom studio, you’ll need a powerful computer that can carry heavy software that are essential for music production.
This means your computer should have as much storage as possible and fast processor to have a hassle-free work. Software used on music productions are not easy and as light to work with.
FULL LIST: Best Laptops for Music Production
WE RECOMMEND: Apple MacBook Pro 15″
DAW Software
Another important thing to be checked off your list is to have a DAW or digital audio workstation software that works best for you.
DAWs are the essential music software that can be installed in your computer to do the recording, editing, and mixing of your tracks.
There are lots of DAWs in the market that would do what it claims, depending on what platform you’re using. Prices would also vary from one brand to another.
If you’re a beginner, start with the one that’s user-friendly and has an easy and uncluttered interface. There are DAWs that offer free trial with limited version, and a great idea would be to make use of that free trial, see where it takes you, and if you like it, go for the paid and full version.
I would say, music productions are nothing without a trusty DAW. DAWs are basically your helping hand when it comes to working with your tracks.
You can put sound effects, make use of the sound templates, change the tempo or pitch of your audio, make use of virtual instruments—practically everything.
FULL LIST: Best DAW Softwares
WE RECOMMEND: Imagine FL Line Studio 20 Producer Edition
Audio Interface
After the music software comes the audio interface. An audio interface is a rectangular box hardware that serves many purposes which can expand and enhance the sonic capabilities of your computer. It brings music into your computer upon recording and out of it during playback.
Audio interfaces are important because sound produced from DAW-based recording system depend on it. Audio interfaces serve as a medium for microphones and other kinds of signal to your computer, and output a variety of signals as well. They also improve the sound quality of your computer by reproducing a more accurate representation of the sounds.
The type of audio interface you’re going to need depends on the type of audios you’re mostly working with. If you plan to record multiple microphones, an audio interface with multiple XLR mic inputs should work well on you.
But, if you’re going to be recording voice-overs for video production, you’ll only need an audio interface with a single XLR input.
Now, if you’re an aspiring DJ, it’s best to get one with four line-level outputs, with two outputs to send your mix to the sound system, and the other two to privately cue songs.
FULL LIST: Best Audio Interface
WE RECOMMEND: Focusrite Scarlett 2i2
Microphones
We all know what a microphone does. But, getting a microphone that captures sound accurately is what’s needed in your studio. For starters, getting a condenser microphone would help your bedroom studio greatly.
Condenser microphones are the type of microphone you can best work with. Mainly used for recording vocals, these mics are known for its sensitivity and wide range of frequencies. They offer lower feedback and can handle various musical instruments and sounds.
On the other hand, if you’re recording more on loud music and loud sound sources without the high frequencies, a dynamic microphone is for you.
Knowing which type works best for you is important because the sound quality that would be reflected to your computer would vary, with each of the mic.
FULL LIST: Best Condenser Mics Under $300
WE RECOMMEND: Audio-Technica AT2035
Microphone Stand
With that being said, you will need a durable mic stand. Whether the microphone you chose comes with its own stand or not, getting a functional mic stand is as important as getting the best microphone for your bedroom studio.
To ensure that you get the best mic stand, you need to check its stability, quality, and durability. Another thing to look at is its construction and its weight. You’re going to need a stand that’s not heavy.
WE RECOMMEND: NEEWER Adjustable Microphone Suspension Scissor Arm Stand
Headphones
Before you start looking for the best headphones for your studio, know that there are 3 different types you’re going to have to get to know. The 3 types are closed-back, open-back, and semi-open headphones.
Two of them are over-the-ear headphones, while, the other one a mix of both types.
A closed-back headphone has its outer part of the headphone cups with a hard enclosure.
Closed-back headphones are designed to isolate you from your surroundings. They largely block the sound aimed towards the world.
Closed-back headphones are useful in recording tracks as they prevent noise from the monitor signal.
An open-back headphone is another type of over-the-ear headphones. This type leaves the back of head phone cup open and let sounds largely go free. This type is helpful when you’re mixing tracks and seems to sound better and more natural.
Semi-open headphones have the features of both open and closed-back types. These headphones have holes or slots in the back of the cup, with the cup at least partly closed. This type aims to give you a balance between accuracy and isolation.
However, not a lot are fond of semi-open headphones as the have a lesser tendency to isolate sound.
FULL LIST : Best Studio Headphones for Recording
WE RECOMMEND: Audio-Technica ATH-M50xBT
Studio Monitors
Among the most important equipment for recording is the studio monitor. While they look a lot like a normal stereo speaker, studio monitors have a deeper purpose as they provide a different sound and are designed for a specific use in recording studios.
Studio monitors offer flat response across the spectrum of frequencies that can be heard by a human being, which are typically from 20 Hz to 20kHz. There are two types of studio monitors—passive and active.
A passive studio monitor does not have a built in amplifier. So, if you’re thinking of placing a passive one in your studio, you’d have to pick the right amplifier and crossovers that would match it to get a flat response.
An active studio monitor is the most common type and has built in amplifiers and crossovers.
Whichever type of studio monitor you like, it’s important that it does not touch the sound, as you want to get the most accurate sound as possible.
FULL LIST: Best Studio Monitors
WE RECOMMEND: Yamaha HS8 Studio Monitor, Black
Cables
With lots of studio equipment, comes numerous cables. However, for a beginner studio like the bedroom studio, you only need 3 analog cables to get you through. Analog cables are the ones that transmit information with the use of electricity.
You’ll need an XLR, TRS, and TS. An XLR is a cable used to transmit sound from mics to the audio interface. A TRS cable can be used for mono, balanced signals. TRS stands for Tip, Ring, and Sleeve, which will be three wires and refers to the parts of the jack plug that the different conductors are connected to.
While a TS cable is unbalanced and sends sounds from the audio interface to your studio monitors. TS cables usually run in mono and you’ll find that noise will go down the line with your signal.
Also Read: 10 Best XLR Cables for Microphones
Pop Filter For Vocals
In your eyes, it might be a simple mic accessory, but it’s one of the equipment that’s worth investing. Pop filters are the ones that look like a strainer attached to the mic. They are noise protection filters for mics.
A pop filter is a great addition to your bedroom studio as it eliminates the popping sounds caused by the mechanical impact of fast moving air on the microphone. They help to minimize plosives like Ps and Bs and can cut down on sibilance (the hissing noise that can come from overly apparent S sounds). They help keep moisture off the mic, which helps preserve your equipment.
WE RECOMMEND: Dragonpad USA 6″ Microphone Studio Pop Filter
Surround Sound & Multi-speaker Systems
Another vital equipment is a speaker system. This is another way to get superior sound in a highly compact form.
Multi-speaker systems are monitoring systems that deliver sub-bass and deep low end through its subwoofer, and supply lows, mids, and high frequencies with its other high-quality compact speakers.
This surround sound and multi-speaker system is a good addition as it serves the low bass frequencies not directly to your ears. It’s like all the bass come from all over the place and is scattered beautifully.
Surround sound and multi-speaker system pack a surprising punch for their diminutive size. If you’ve been mixing on computer speakers or headphones, do yourself a solid and try this type of setup.
WE RECOMMEND: BOSE Home Speaker 500
FOR DEDICATED HOME STUDIO

Had enough with the little space your bedroom has to offer? Try taking one step further and upgrade to a dedicated home studio.
Studio Desk
One of the first equipment you should invest in is a sturdy studio desk. Ditch your normal desk and upgrade to the one that’s made solely for recording studio purposes.
As the centrepiece to a dedicated home studio, studio desks should both be functional and heavy-duty. You’ll need a desk that could cater the necessary studio equipment that has to be put on a table, for you to work comfortably.
A studio desk is a great need for your productivity and organization. An organized and well-put work area could highly affect your presence of mind. That being said, having your own studio desk will maximize your creative juices.
If you’re feeling a bit spendthrift, you can go for a customized mixing desk, but it’s not really necessary, since there are a lot of readily available studio desks in the market.
WE RECOMMEND: On-Stage WS7500 Series Wood Workstation
Studio Chairs
A nice piece of studio desk is nothing without a high quality studio chair. Since you’ll be working with your tracks most of the time of the day, your comfortability is a major concern. You wouldn’t want unwanted back pains, would you?
For this reason, getting a comfy and cozy studio chair is highly recommended. Studio chairs are what you typically see in offices, the ones that are big enough to hug your entire body. You’ll know it’s a great studio chair when it has solid lumbar support, headrest, armrests, and some wheels.
A well-built studio chair is necessary in every dedicated home studio because it simply makes things easier. You can just roll across the room to get to your second PC, adjust some wires, or just fix something, without having to get up. It does not just make things easy, you’re also more productive and faster.
WE RECOMMEND: Flash Furniture Mid-Back Black Mesh Swivel Task Chair
Studio Monitor Stands
In line with the studio monitor accessories, you’ll also be needing stands. Of course, we know what stands are and do. But, did you know that how and where you position your studio monitors would greatly affect your audios?
Now that you know, getting a durable studio monitor stand as one of your recording equipment is your next step. Other than putting your studio monitors on your desk, having it on a stand works wonders.
Studio monitor stands elevate your monitors and eradicate any possible comb filtering effects caused by small vibrations between the monitors and other equipment on your studio desk. This means that the audio produced by the monitors is less likely to be “disturbed” by resonances and small reverberations.
WE RECOMMEND: Ultimate Support JS-MS70 JamStands Series
Monitor Isolation Pads
You use your studio monitors so you’ll know how your recordings sound. If you think your audios are pretty decent, wait until you install monitor isolation pads. You’ll hear its true sound quality upon isolating your studio monitors from the background “noise”.
Basically, studio monitor isolation pads are a type of device built to create a sonic separation between your studio monitor and the surface they’re resting on. This improves the accuracy of your monitoring instantly by bringing your acoustic environment closer into alignment with what was intended for your monitors.
WE RECOMMEND: Adam Hall PAD ECO Series SPADECO1 Monitor Isolation Pad
DAW Remote HD
If easy accessibility sounds like an excellent idea for you and your idea of productivity is by working even in your sofa, then having a DAW Remote HD would sound so inviting.
DAW Remote HD is a downloadable app that could control your DAW remotely and wirelessly, so you can have a smoother workflow and concentrate on composing. The DAW Remote HD is compatible to numerous DAWs. However, it can only be downloaded on iOS devices.
With its purpose comparable to a control surface, you can customize and layout an easy-to-use interface.
Virtual Instruments (VST Software)
There is nothing more helpless than having limited options. And to produce music, it is really important to have a wide range of music add-on options. This is why having a VST is beneficial since it allows you to incorporate numerous musical instruments and other sound effects.
A VST or Virtual Studio Technology is a software plug-in that can be connected and installed to your DAWs, so it can’t run independently without a host application. VSTs allow any third party developer to create their own VST software plugins.
As its name suggests, VST holds limitless sound effects (musical instrument, analog synths, sample playbacks, etc) which would be extremely helpful in music production. With your creative juices flowing and a couple of mix-n-match of sound effects, you’ll be one step closer to creating your masterpiece.
WE RECOMMEND: Spectrasonics Omnisphere 2
Hardware/ Software Workstation
In case your DAW is going haywire and you need to edit tracks ASAP, looking for a simpler interface, or just simply want more options, you might think of considering a hardware/software hybrid workstation.
Hardware/Software workstations are a combination of MIDI controller, sequencer, and music editor rolled into one. This is like a hands on approach to music production, unlike using DAWs where all the editing happens behind one screen.
These workstations are best alternative to the traditional DAW software. These would come in handy when your favorite DAW crashes and there’s no way to resurrect it at the moment. However, if you just want to try it out, it can be used in collaboration with your DAW, by loading them as a VST.
WE RECOMMEND: Ableton LIVE 10
Bass Traps
Without an acoustic treatment on your dedicated home studio, your recordings won’t sound as professional and clean as they should. Even with a great sounding and high-end mics, you’ll still need to address other factors that affect how your audios would turn out.
With that being said, you’ll need to add bass traps in your studio. A bass trap is a low frequency sound absorber used to reduce the effects of standing waves in a room. For it to be effective, you can place bass traps in corners or along wall joints where low frequency energy tends to build up.
Bass traps are excellent in absorbing lower frequencies, which are sometimes the reason behind audio problems among studios.
So, if you want to avoid low frequency problems, treating your studio by using bass traps is a must. Controlling and containing the bass in your studio are done remarkably by bass traps.
WE RECOMMEND: Acoustic Foam Bass Trap Studio
Acoustic Panels
In addition to acoustic treating your studio, acoustic panels increases the chance of having a better audio outcome.
Acoustic panels are sound absorbing panels that are hung on a wall or ceiling to control and reduce noise, eliminate slap echo and control comb filtering in a room. They use fewer materials since it’s a thin board.
These sound absorbing panels come in a large variety of sizes, types and colors to meet your design, budgetary, and durability requirements. It is necessary for your dedicated home studio since it contains most of the best sound from echoing across your studio. These come handy when you’re recording vocals.
WE RECOMMEND: ATS Acoustic Panel
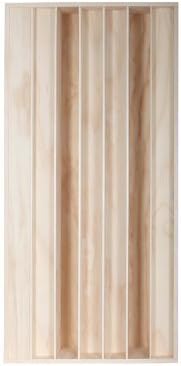
Acoustic Diffusers
The last thing to get that falls under the acoustic treatment portion are sound diffusers. Diffusion inside a home studio creates a natural ambience.
Sound diffusers are designed to scatter or disperse sound waves, thereby reducing standing waves and echoes to improve sound clarity. They allow all frequency ranges to scatter randomly and are more effective in larger rooms.
Diffusers, aside from recording studios, commonly serve critical listening environments like control rooms, music production and live music rooms.
WE RECOMMEND: ATS Acoustic Diffuser
Reflection Filters
Another equipment that works as an acoustic treatment is the use of reflection filters. A reflection filter is designed to absorb some of the sound that would hit the rear of the mic.
It is placed near the mic to provide some helpful absorption of sounds that would otherwise reach the rear-facing sides of the mic, and also to catch and absorb some of the direct sound from the vocalist.
Reflection filters are great investments when you’re recording vocals mostly, and you don’t want to treat the entire studio. However, using reflection filters alone does not produce as great sound as the one coming from a studio that uses proper acoustic treatment in conjunction with reflection filters.
WE RECOMMEND: sE Electronics Reflexion Filter X Portable Vocal Booth
FOR SEMI-PRO STUDIO

Microphone Preamp
Now, let’s go back to microphones. If you’re recording more than one vocal, you’ll need more input channels. This is where mic preamps will come handy, as they boost the output and signals from your microphones.
A microphone preamplifier is a device that prepares the signal of your mic to be processed by other equipment. Since microphone signals are sometimes too weak to be transmitted to other units, a mic preamp is just what you need.
When you get a mic preamp, expect to have better sound quality, lower noise, and more gain.
WE RECOMMEND: Focusrite Scarlett Solo (2nd Gen)
Headphone Amp
Headphones have amplifiers, too. And there are a lot that can be found in the market.
A headphone amp is a relatively low-powered amplifier that raises the low-voltage audio signal from a source device to a sufficient level such that it can be converted into sound waves by the speakers inside your headphones.
You’ll need this because it provides gain without too much noise.
WE RECOMMEND: FiiO E10K USB DAC and Headphone Amplifier
Monitor Management System
Having a monitor management system is an essential part of a semi-pro studio, especially when it comes to multi-tasking. Monitor management system lets you compare and listen your tracks in different devices.
Monitor management system lets users to switch from one output to another in a single push of a button. This allows you to control your studio speaker output selections and gives you the possibility of routing your mixer cues between you and other musicians.
WE RECOMMEND: TC Electronic Level Pilot
Audio Control Surface
To make things simple, a control surface is conceptually a more generic form of controller. Control surfaces are devices that feature knobs, faders, encoders and tracking controls.
They are designed for comprehensive control in the studio including of mixer functions and DAW navigation.
This makes things easier by letting you manoeuvre the sequencer while recording, and the same time providing transport controls.
During the early stage of capturing your musical ideas, where small irritations can become huge creativity killers, you are probably better served with the control surface close at hand to where you create your tracks.
WE RECOMMEND: Korg nanoKONTROL2 Slim-Line USB Control Surface
MIDI Controller
MIDI or Musical Instrument Digital Interface Controller serves as a platform for electronic instruments, controllers, and computers, and allows these to exchange information on musical notes and data.
If you like a hands on approach in creating your own melody, using a MIDI controller would let you do this easily.
Quick Tutorial: MIDI & Music Synthesis
Create more personal tracks with lots of expression by using MIDI controller. Controller keyboards are the most common media to use MIDI. It looks like a piano, since it has a set of keys (ranging from 25 to 88 keys).
Using MIDI controller keyboards is a great way to experiment and explore other music styles. You can incorporate different musical instruments on your tracks, but it focuses mostly on pianos.
FULL LIST: Best MIDI Controllers
WE RECOMMEND: Novation Launchkey 49 USB Keyboard Controller
Electronic Drum Kit
Although you can record an actual drum sound in your studio and transfer that audio to your computer, there’s nothing like the results of using an electronic drum kit.
The most famous conceivable percussion range from basic drums to hi-hat to cymbals. And if you’re fond of using these instruments, whether actual or electronic, then the electronic drum kit would serve you best.
Aside from getting reliable results, using an electronic drum kit is actually really entertaining. Once everything is set, you can even use samples and synths to add into your mix to have an even better final output.
FULL LIST: Best Electronic Drum Kits for Beginners
WE RECOMMEND: Alesis Nitro Kit
Drum Mic
While some drum kits have a drum mic as a freebie, some manufacturing companies do not.
So, avoid wasting time and just directly use a drum mic.
If you’re usually recording bands, then drum mics would come really handy. You’ll find that using drum mics will give you better results.
The best one to use is the ones that are specialty drum mics since they can handle very high SPLs and specific frequencies of different types of percussion in a drum kit.
FULL LIST: Best Drum Mics
WE RECOMMEND: Shure PGADRUMKIT7
Audio Compressors
Another way to manipulate your audio quality is to compressors. Compressors are units that reduce the wide gap between the loudest and quietest levels. This creates a more consistent audio level when you’re recording.
Compression is useful to smooth out a vocal track that pitches from very loud to incomprehensibly soft. Compression also keeps an instrument range within the range of your recording equipment, enabling you to record a clearer, clean sound.
WE RECOMMEND: dbx 266xs Professional Audio Compressor
Equalizer
Aside from its place in a semi-pro studio, equalizers can be found in your car, phone, theaters, and audio players. It’s that useful and important when it comes to sound quality.
Equalizers may be either hardware units, or software plug-ins. Equalizers are software or hardware filters that adjust the loudness of specific frequencies or compensates for different tonal side effects and places them in synchronization.
They use various filters and allow you to adjust, or gain, the frequency ranges of the audio signals.
We Recommend: Behringer Xenyx X1222USB
Gates and Expanders
Expanders and gates act as noise management devices. Unwanted noise and instrument leaks are among the enemies of every recording studio, so might as well eradicate it totally.
Gates act more like an on/off switch when the threshold is reached, while an expander attenuates the output in relation to the input – a bit like the way compressors work but in reverse.
Expanders act like a gate but instead of muting the signal once it falls below the threshold, the expander still lets some signal through but at a lower level, resulting in a signal of lower volume.
Both are important especially when recording drums and guitar amps.
We Recommend: dbx 266xs Professional Audio Compressor/Gate Dynamic Processor
Rack Mount
With the addition of new and necessary equipment, your organizational skills will be put to test. After getting a nice piece of studio desk, the next equipment to get are rack mounts.
Rack mounts are hardware device capable of being mounted in a special rack. If we’re talking about rack mounts, it can also mean the “actual” rack. Rack mounting is common especially if you have a lot of devices that need to be put in one place.
Rack mounts are essential especially if you’re already recording bands, as you’re going to need more channels and other additional equipment. With rack mounts, you can put equipment wherever you like, so you can put the routing and signal flow in line with your preference.
WE RECOMMEND: Odyssey CRE04
Power Conditioner
Another very important addition to a Semi-Pro Studio is a power conditioner. A power conditioner is a device that sits between a computer and its power supply, typically a wall outlet.
It’s like a surge protector, as it offers protection against power surges. It also maintains a continuous voltage fed to the computer during temporary voltage reductions, such as a brownout.
Also called as a “line conditioner”, it can combine the power for the entire rack into a single cable. Power conditioners are beneficial especially to your equipment, as it extends their shelf life and would make them own a better performance.
WE RECOMMEND: Furman M-8X2 Merit Series 8 Outlet Power Conditioner
Snake Cable
Tangled cables are inevitable, especially if you have a lot of recording equipment lying around. As someone that works for long hours inside a studio, it would really hurt your eyes to see the back of your rack dominated by a lot of cables. This is where snake cable comes in.
As defined by Wikipedia, a snake cable is a thick cable which contains from four to 64 individual audio cables inside a common, sturdy outer jacket.
Snake cables enable all of the instruments and vocals to be plugged into one signal cable and also control the amount of cables going to and from the soundboard. This maintains the organization of your studio and keeps it that way.
WE RECOMMEND: Seismic Audio XLR Low Profile Circuit Board Snake Cable
Uninterruptible Power Supply (UPS)
If you’re in a location where power interruptions occur often, a UPS should really be in your recording studio. UPS is a type of power supply system that contains a battery to maintain power to provide power to electronics in the event of a power surge or outage.
Typically UPS power keeps a computer running for several minutes after a power outage, enabling you to save data that is in memory and shut down the computer gracefully.
UPS are often used so that computers will have enough time to properly shut down. Computers shutting off suddenly will really take a toll on its hardware, which would really damage your data.
If you’re in this type of business, you’ll know that all kinds of data are important and should be protected at all costs. If you don’t want to lose your hard day’s work, go and invest in a reliable UPS.
WE RECOMMEND: CyberPower CP1500AVRLCD
Signal Direct Box
Direct Injection or Direct Input (DI) box is an electronic device that converts an unbalanced, high-impedance signal (like a guitar or keyboard’s output) into a balanced, low-impedance signal like that of a microphone. It creates an overall cleaner sound with minimal noise.
According to its features, there are lots of types of DI boxes. There’s a passive DI which only uses passive components and does not need power for it to function. The next one is an Active DI which has an integrated preamp and allows higher-level output. Active Dis eliminated the need to amplify the signal after the DI.
Multichannel Di’s have multiple inputs or outputs, sometimes both. Integrated Dis can be found on amplifiers and effect pedals, which can sometimes place the output before or after the preamp and EQ stages.
Lastly, there’s the reamp boxes which send recorded signals back to amplifiers for re-recording and fine-tune output level and impedance.
DI boxes proves its purpose by allowing a clean record with an unaffected guitar or bass signal They’re also ideal for long cable runs that would pick up a lot of noise if a standard guitar cable were used.
Direct injection can also be used to intentionally overdrive a preamp, creating a unique type of clipping distortion.
WE RECOMMEND: Behringer Ultra-DI DI400P Professional High-Performance Passive DI-Box
FOR PROFESSIONAL STUDIO

Digital Converters
Digital converters serve two purposes—to convert analog audio into digital and vice versa. A stand-alone digital converter might not be budget-friendly, but it will be a sound investment for sure.
Digital converters take the electrical signal from your instrument or mic and translate it to a digital form that can be used by your Digital Audio Workstation (DAW), which in this case is a combination of your home computer, audio interface, and recording software.
We Recommend: Lynx Studio Technology Aurora (n) 16 TB
Master Clocks
As its name suggests, a master clock is basically a clock. But, it’s not a normal clock that we hang on our house, as master clocks provide the timing data that allow the conversion of the analog and digital waveforms.
As you’ve probably notice while editing your tracks, timing is very crucial. Timing plays an important role as it helps maintain audio quality. When the timing varies, the sounds might be distorted which would likely cause the sound quality to be altered.
Master clocks maintain synchronization on each sample sound so it would be easy to record and replay.
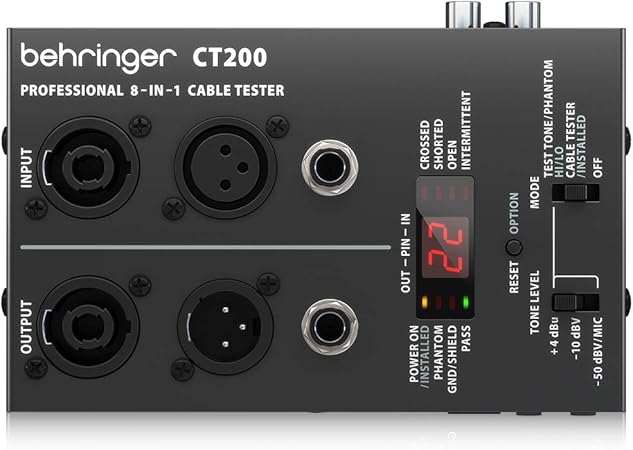
Cable Testers
Since you have a lot of equipment in your studio, this also means you’ll have lots of cables.
And a cable tester might come in handy to maintain these cables.
A cable tester is a device that allows you to test your cables’ or other wired assemblies’ strength and connectivity.
You’ll find this very useful if you feel like you have noise problems you need to track down. A cable tester will allow you to find which cable or cables are causing the problem.
SPL Meters
SPL or Sound Pressure Level meter is a high-end decibel meter which lets you test how loud your sound source is. If you’re prone to working with a variety of audios, you might need detailed and accurate readings to maintain a certain level or sound pressure.
Patchbays/ Patch Panel
This might sound unnecessary, but patchbays are a must in building a Pro Studio. Patchbays or Patch Panels allow multiple pieces of audio equipment to be easily connected in different combinations.
The inputs and outputs of certain equipment can all be connected to the back of a patchbay patched in any order with small patch cables on the front panel.
Patchbays can permanently connect equipment, so that a patch is only required when different routing is required. An example of this is when a microphone line is normalled to a console channel that can be routed to an external preamp instead.
To Wrap Things Up
These recording studio equipment listed above are essential in building (or completing) a recording studio you can call your own.
While some of these might make you think, “Are these even necessary?”, for the betterment of your tracks and recordings, it’s a big yes.
Plus, you don’t have to pick out the high-end ones, you only have to be smart on your choices and pick the ones that won’t break the bank.
This has been a lengthy post, but I hope that you’ll find it useful in setting up your own recording studio.
Did we miss something? Let me know by leaving your comments below.






I built my studio with this incredibly awesome article!
Awesome! Glad this article helped you, cheers!